What's in the box
- Target hub with battery and 915 MHz antenna: the box behind the target. Five sensor jacks marked TL1, BL2, C3, BR4, TR5.
- Firing-line relay with battery and antenna: makes the WiFi your phone joins and runs the app.
- 6 sensor pods (5 + 1 spare) with magnetic backs, and 6 sensor cables (6 ft).
- 8 backer bases: bottom corners, top corners with slide-in pod plates, bottom centre (5 per target, plus spares).
- Foam tape for coroplast, tape measure, USB-C charger and cables, and the waterproof case.
You supply: a coroplast backer and cardboard targets (from the shop, or your own: backer = target + 2 in), two wooden stakes (2x2), a staple gun or screws, and a phone or tablet.
OVERSIGHT hears the bullet's shockwave, so the bullet has to be supersonic when it reaches the target (above about 1,150 fps). Subsonic loads won't register, and most .22 LR won't.
1. Charge the hub and relay
Charge both before your first range day with the USB-C charger and cables in the box. The USB-C port and the power switch are on the left side of each box, under the four battery lights:
| Charging | The lights fill up from the left; the next one pulses amber. |
|---|---|
| Full | All four green. |
| Switched on | The charge shows for 5 seconds (4 lights = over 75 %, 1 light = under 25 %; amber under 40 %), then flashes every 10 seconds. |
| One red light blinking | Under 20 %: charge it soon. |
The app also shows each target's battery once you're connected.
Screw the antennas on before you switch the hub or relay on, and keep them on. They stand straight up.
2. Put up the backer
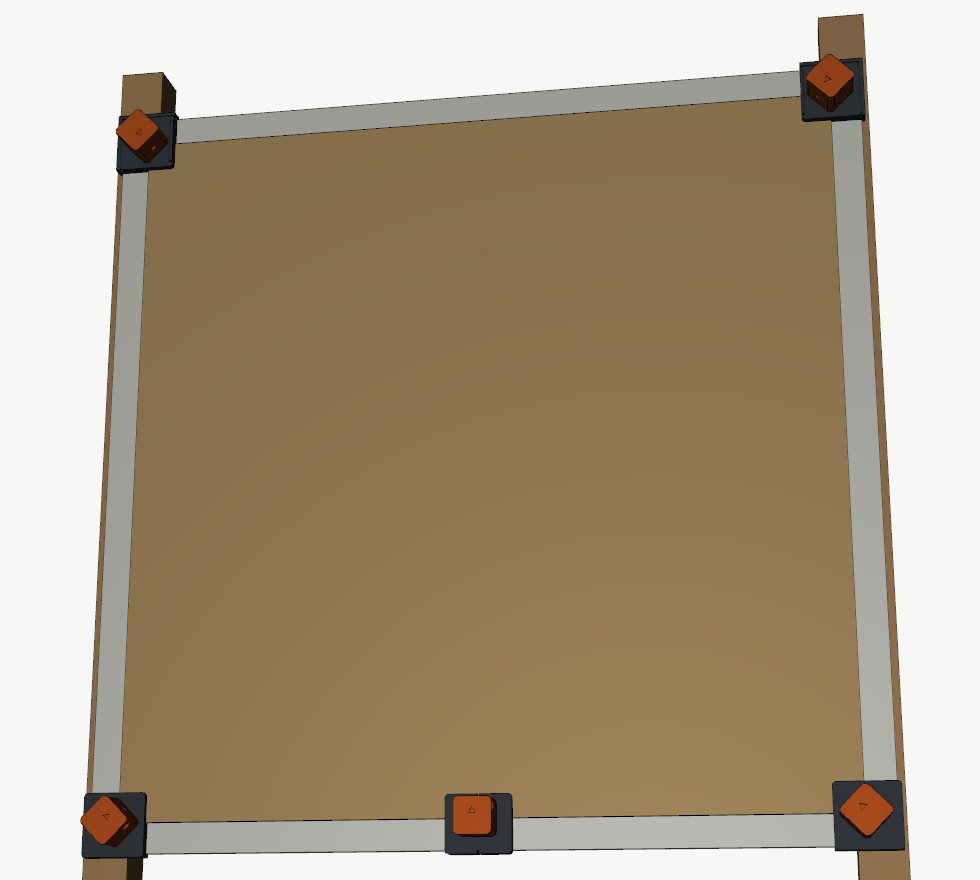
- Staple (with washers) or screw the coroplast backer to two wooden stakes behind it.
- Drive the stakes so the backer stands upright and square to the firing line, at the distance you'll shoot.
- Keep the stakes and the hub behind and below the target, out of the line of fire.
3. Fit the bases (once per backer)
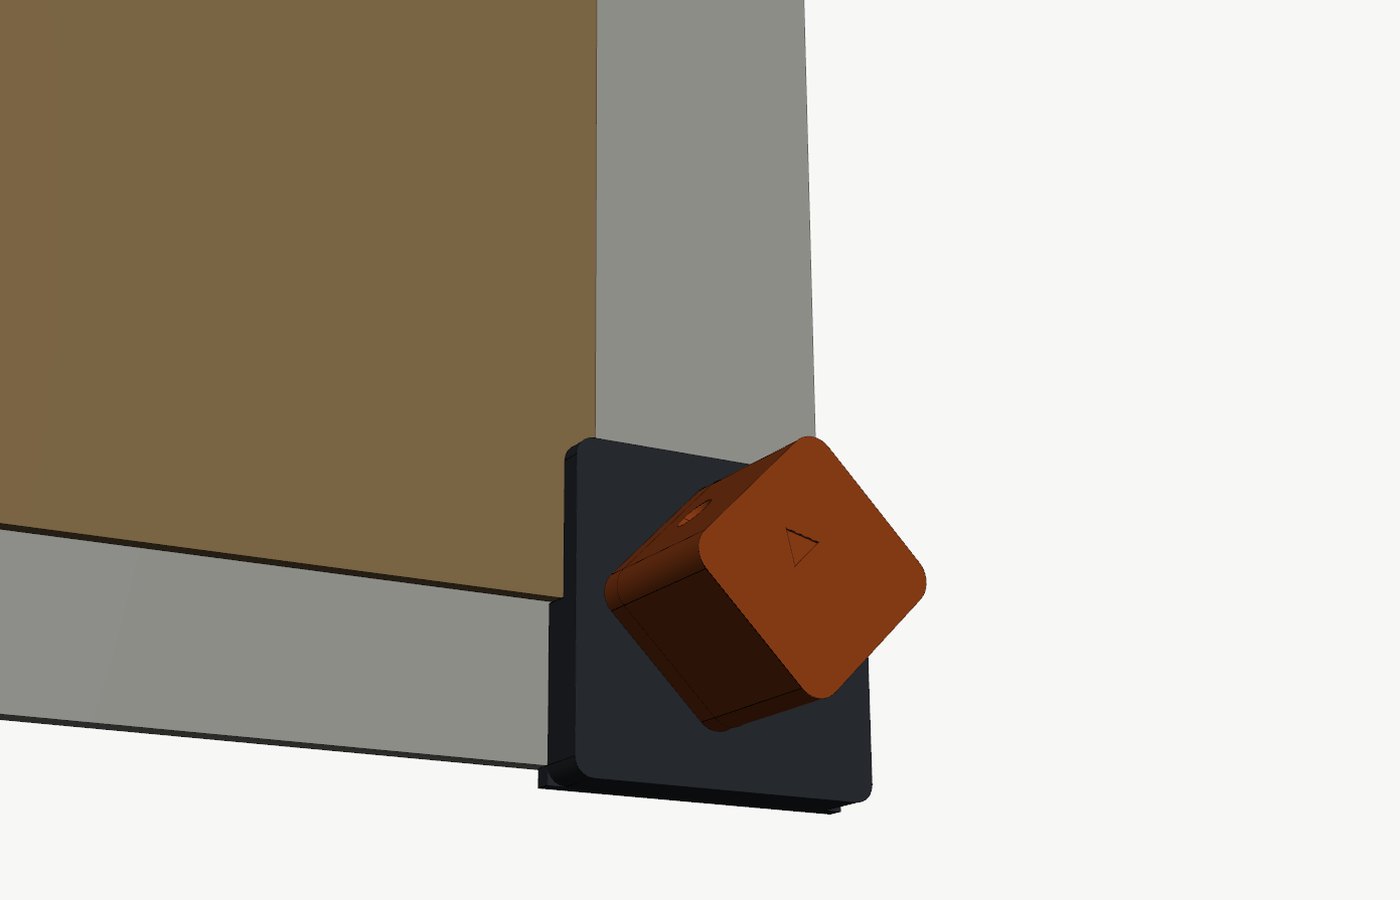
The bases stay on the backer once fitted. Use the foam tape from the box: coroplast needs low-surface-energy tape, and ordinary foam tape lets go.
- Wipe the backer's corners and bottom-edge centre with isopropyl alcohol and let it dry.
- Put strips of tape in each base's tape recess.
- Corners: push each corner base into its backer corner until both lip walls touch the backer's outside edges, then press hard for 30 seconds. The engraved arrows point at the centre. The top bases' rails run along the top edge (R on the right, L on the left).
- Bottom centre: line the base's notches up with the centre mark on the bottom edge, lip against the edge, and press.
4. Put a target on
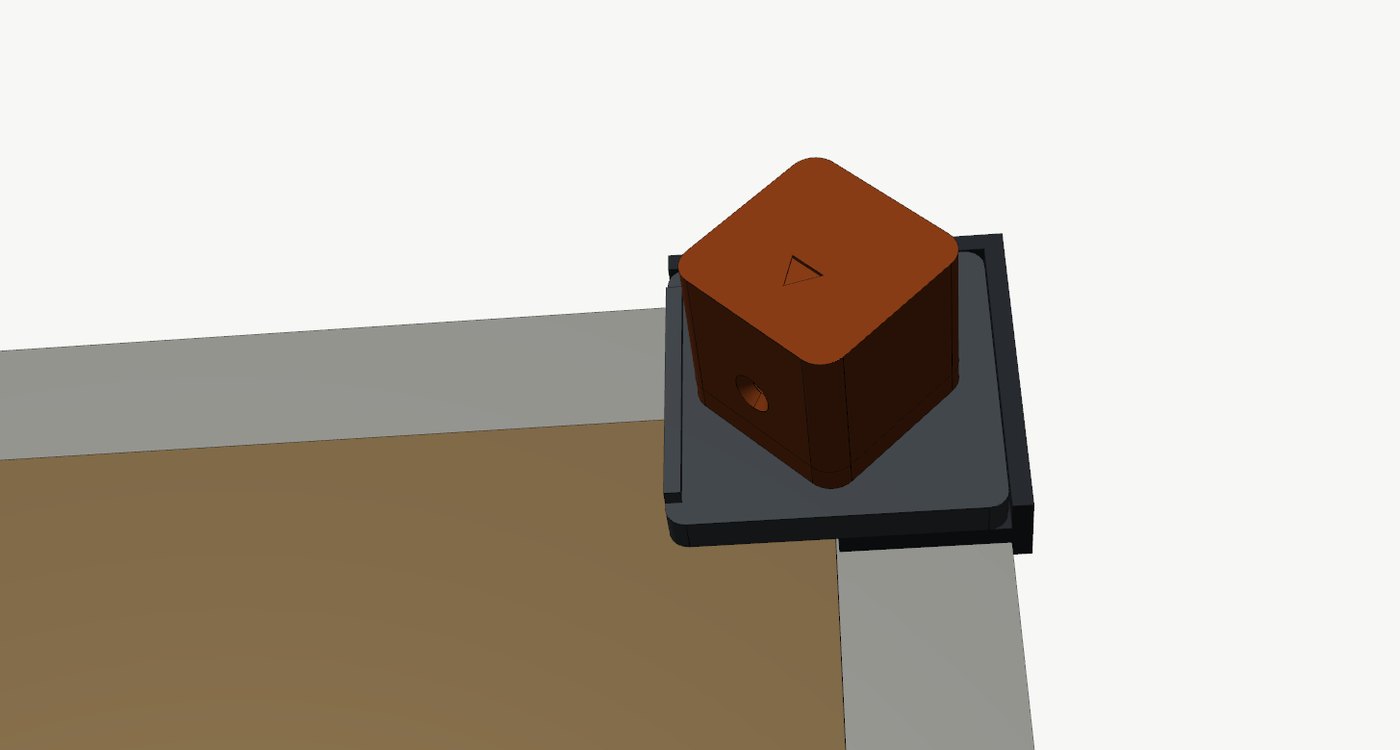
- Slide both top pod plates off their rails toward the target centre. The pods can stay clipped on.
- Slide the target's bottom edge down into the three bottom slots until its bottom corners stop in the corners of the slots. Flex the top of the target out a little as you slide so it clears the top bases.
- Lay the top flat: its corners sit just inside the top bases.
- Slide each pod plate back onto its rail from the centre side until it stops. It covers and clamps the target's corner.
To change targets, slide the two plates off, lift the top of the target out, and slide it up out of the slots. Your own paper targets: staple or tape them onto a blank cardboard target, or onto the backer inside the five bases.
5. Clip on the pods and plug in the hub
- Clip each pod onto the base with the same mark: TL1 top left, BL2 bottom left, C3 bottom centre, BR4 bottom right, TR5 top right (as seen from the firing line). The magnets only let a pod seat one way, port toward the centre.
- Plug each pod's cable into the hub jack with the same mark. A swapped cable puts shots in the wrong place, so check the marks.
- Put the hub behind the target, below the backer or behind a stake, with its antenna upright. Switch it on.
With five pods the target keeps working if one is knocked out. Clip the spare on and you're back to five.
6. Set up the relay and join its WiFi
- Put the relay at the firing line with its antenna upright (the tripod thread underneath fits a camera tripod). Switch it on.
- On your phone: Settings › WiFi › join
OVERSIGHT, passwordshoot1000. If the phone says the network has no internet, choose to stay connected. - Open
192.168.4.1in your browser (bookmark it, or scan the lane card), or open the OVERSIGHT app for Android and tap Connect. Phones stay on the relay's WiFi; it has no internet, so messages and web pages wait until you leave it.
7. Pick your target
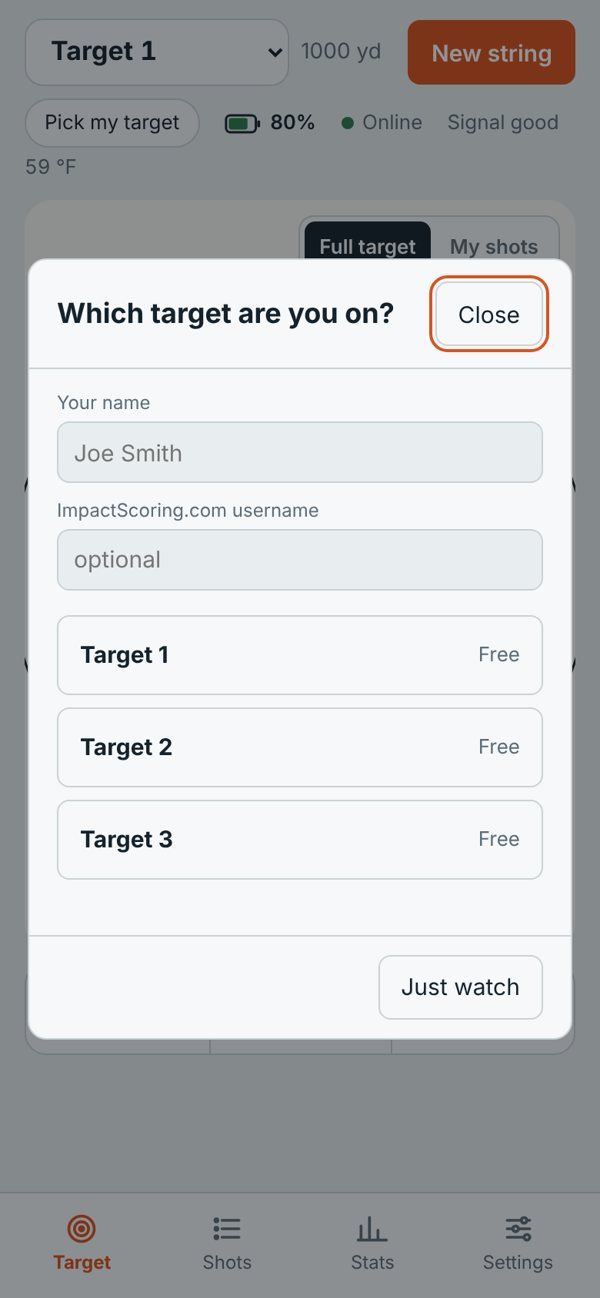
- The app asks Which target are you on? Type your name (and your ImpactScoring.com username, if you have one).
- Tap your target, then Start. Your name shows on it for everyone on this relay. Just watch lets you follow any target without taking it.
- On a shared board with several bulls, tap your bull(s) before Start: you only see your own shots.
8. Tell the app about your target
Open Settings and set:
- Shooting: distance (yards), board size (12, 18, 24 or 36 in) and the target design you hung. Add your bullet diameter and your scope's click value so corrections come out in clicks.
- Frame and sensors: enter your target size as the sensor spacing (a 24 in target is 24 in), tap Fill for Lite mounts.
- Tap Save settings.
Use Fill for Lite mounts, not Fill corners + bottom centre. The second button is for the frame kit; with Starter System bases it reads groups about 3.5 % too big.
9. First shots
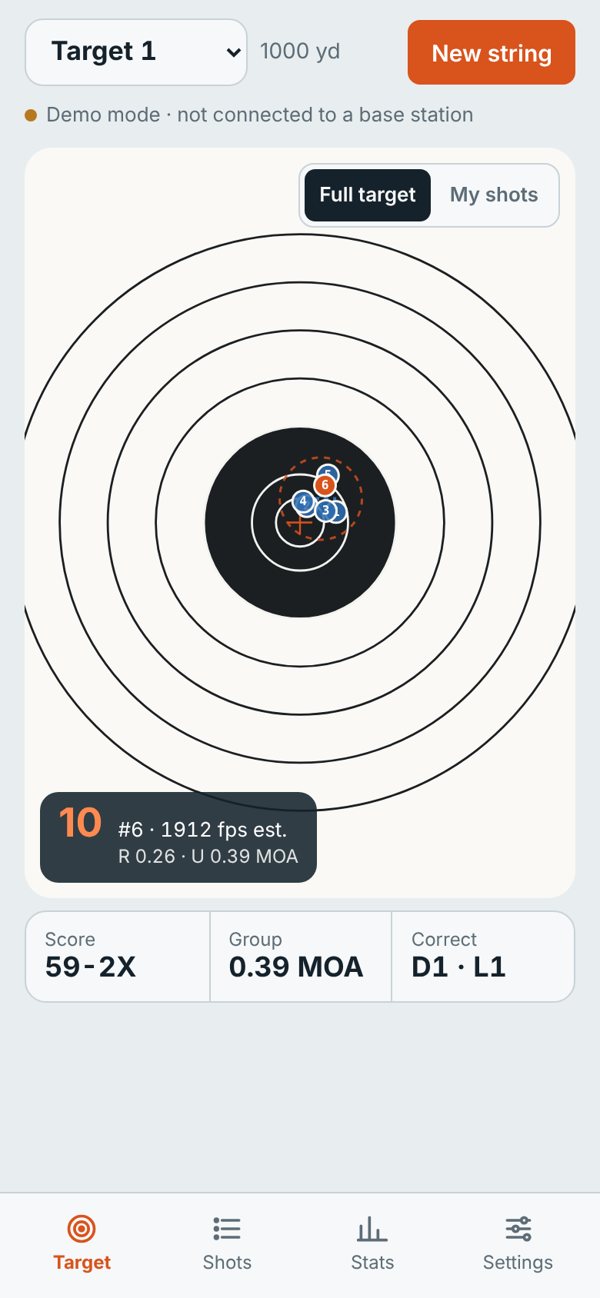
- Fire 3 shots at the centre. Each one appears within a second with its score, position and estimated velocity.
- If the group lands where you aimed, you're set. If paper and screen disagree, see Calibrating the centre.
- New string starts a fresh string. Shots lists every shot; Stats shows extreme spread, mean radius, vertical spread, velocity SD/ES and the sight correction; Export CSV saves the string.
10. Packing up
- Tap Leave on your target so the next shooter can take it.
- Switch off the hub and relay. Slide the pod plates off, take the target out and unclip the pods.
- Pack every part in its place in the case and charge the hub and relay before next time.
Supersonic rifle fire only. Follow your range's rules, and never shoot at the pods, bases, hub or stakes.
Still stuck?
Email info@oversighttargets.com with what you see and, if you can, a photo of your setup or the app's debug export (see Sending us data). We reply within one business day.